My nana taught me this hack to remove hard water stains in 2 mins with 0 work. Here’s how it works
Tips 28/10/2025 22:29
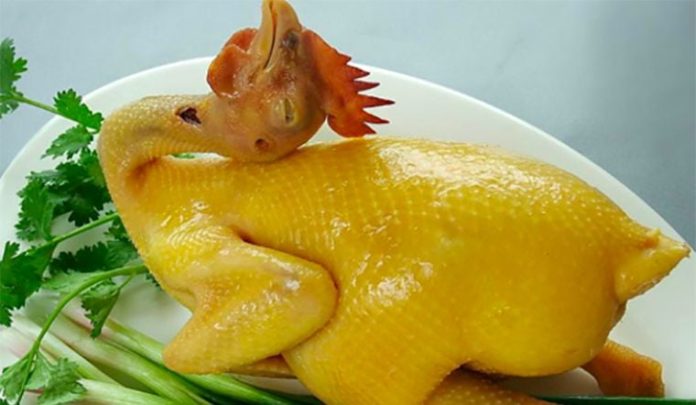
Boiling chicken may sound like one of the simplest cooking techniques, but achieving that perfectly cooked bird — with smooth, unbroken skin, tender and juicy meat, and no redness near the bone — is not something everyone can master. Professional chefs have their secrets, and today we’ll reveal a foolproof way to boil chicken beautifully every single time.
The very first and most crucial step in making delicious boiled chicken lies in choosing the right bird. The quality of the chicken determines not only the flavor but also the appearance and texture after cooking.
Ideally, pick young chickens, often called “spring chickens.” These have tender meat that stays juicy after boiling and produces a rich, naturally sweet broth. A good size to aim for is between 1.5 to 1.8 kilograms (about 3.3 to 4 lbs) — large enough to yield flavorful meat, yet small enough to cook evenly without becoming tough.
If you’re buying a live chicken, look for one with a bright red comb, sleek feathers that lie close to the body, warm feet, and slim, elongated legs. Avoid chickens that appear sluggish, have sticky beaks, or watery eyes — these are signs of illness.
If you’re buying a prepared (cleaned) chicken, pay attention to the skin color. The skin should have a natural golden hue, evenly colored, and slightly elastic when pressed. The flesh should feel firm and springy, and the tail (parson’s nose) should be small. Avoid chickens with grayish or purple skin or those with excessive fat around the neck and thighs, as these are often low-quality or industrially raised.
Another key to preventing cracked skin lies in the size of the pot. Choose a deep pot that can fit the entire chicken comfortably without bending or crowding it.
For a chicken around 1.5–1.8 kg, a pot with a diameter of about 28 cm (11 inches) is ideal. A pot that’s too small will squeeze the chicken, causing uneven cooking and potential skin tears. On the other hand, a pot that’s too large may cause the chicken to shrink and dry out as it boils.
Once the chicken has been cleaned and plucked, rub it thoroughly with coarse salt to remove any residual odor and slime. Rinse the chicken inside and out with clean water, then let it drain in a colander until dry.
Prepare three stalks of green onions and a few slices of fresh ginger. You can tie the onions together (roots on if possible) — this bundle will infuse aroma into the broth and help remove the chicken’s natural smell.
Place the chicken into the pot and pour in cold water just enough to submerge the bird. Add the green onions, crushed ginger, and half a teaspoon of salt to the pot.
Here’s the most important tip: always start with cold water. Putting the chicken into cold water allows the heat to gradually rise, ensuring the meat cooks evenly from the inside out. If you drop the chicken into already boiling water, the outer skin will tighten and crack, while the inside may remain raw and red.
As soon as the water comes to a gentle boil, reduce the heat to low. Keeping the flame high will cause the thigh meat to contract sharply, making the chicken look distorted. Let the water simmer gently for about five minutes, then lower the heat even further and cook for another five minutes before turning off the stove.
During this stage, do not cover the pot lid, as steam buildup can make the skin tear or the meat cook unevenly.
After turning off the heat, cover the pot and let the chicken rest in the hot water for another 20 minutes. This resting period allows the heat to penetrate evenly to the core, giving you moist and tender meat.
Cooking time can vary depending on the chicken’s size — larger birds may need an extra 5–20 minutes of simmering, while smaller ones might finish a bit sooner. Always check the thickest part of the thigh: if the juices run clear (not pink), your chicken is perfectly done.
If you want that gorgeous glossy yellow skin often seen in Vietnamese or Chinese boiled chicken dishes, prepare a small bowl of warm chicken fat or sesame oil. Once the chicken is fully cooked and slightly cooled, brush the surface with this mixture. The result? A bird that’s not only delicious but stunningly beautiful on the table — ideal for family gatherings or festive meals.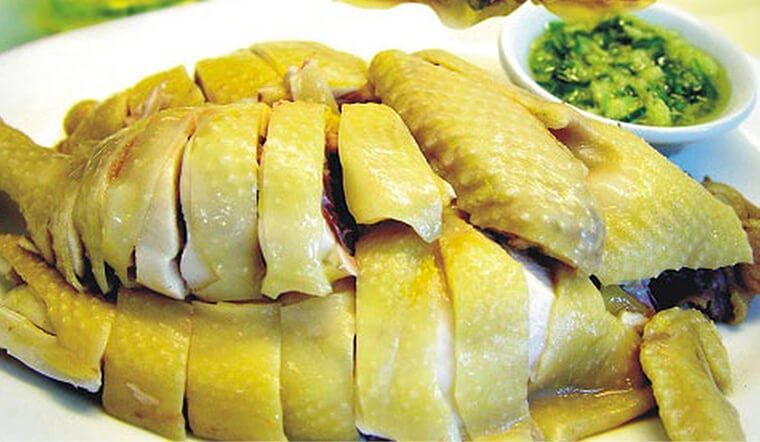
Perfectly boiled chicken is all about patience and precision — gentle heat, a good-quality chicken, and the right timing. With this simple yet professional technique, you can create a tender, flavorful, and picture-perfect boiled chicken that’s every bit as impressive as what you’d find in a fine restaurant.