My nana taught me this hack to remove hard water stains in 2 mins with 0 work. Here’s how it works
Tips 28/10/2025 22:29

Why does pickled garlic turn green?
It’s quite common for garlic soaked in vinegar to turn a bluish-green color. Although it’s still perfectly safe to eat, many people find the color unappetizing. Most of us prefer our pickled garlic to stay beautifully white and clear.
Garlic naturally contains an amino acid called alliin. Vinegar, on the other hand, is made primarily of acetic acid (CH₃COOH). When garlic is soaked in vinegar, the amino acids in the garlic react with the acid and form new compounds. These compounds contain carbon- and nitrogen-based pyrrole rings.
In an acidic environment, the pyrroles link together to form colored molecules. When three pyrroles combine, they produce a green pigment; when four pyrroles link, they turn blue. This chemical reaction explains why garlic sometimes develops that unexpected color after pickling.
In most cases, garlic turns green when it is too young or improperly processed before pickling. Mature garlic cloves rarely change color, so choosing the right type of garlic is the key to success.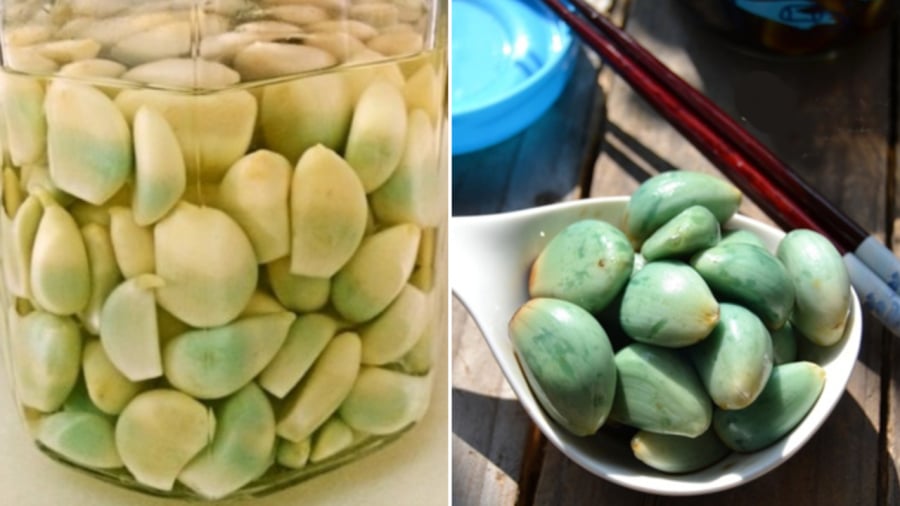
To make perfect pickled garlic, choose fully matured bulbs. The outer skins should be dry, firm, and smooth, not wrinkled or damp. Each clove should feel solid and plump—avoid any that are soft or sprouting.
Once you’ve selected your garlic, peel off the papery skin and rinse thoroughly. You can either pickle the cloves whole or sliced depending on your preference:
Whole cloves preserve longer but take more time to absorb flavor.
Sliced garlic ferments faster and tastes sharper, but loses a bit of its essential oil and aroma.
Before soaking, place the peeled garlic in a bowl of cool boiled water with a pinch of salt. Let it sit for about an hour—this step helps to remove harshness and reduces the chance of discoloration. Drain the garlic completely before adding it to your pickling mixture.
For extra flavor and visual appeal, you can also add chili peppers. Simply remove the stems, wash them well, and pat dry. Small chilies such as bird’s eye or Thai chili can be pickled whole, while larger ones should be sliced into smaller pieces.
The vinegar you use plays a big role in the final color and taste. Choose naturally fermented rice vinegar with a mild acidity and gentle aroma. Avoid synthetic or overly strong vinegars, as they can alter the garlic’s color and taste.
In a small pot, mix the vinegar with a bit of filtered water and a small spoon of sugar—the sugar helps to balance the sourness and create a smoother flavor. Bring the mixture to a boil, then let it cool completely before using.
Use a glass jar for pickling. Plastic or metal containers can react with the acid and affect flavor. Sterilize the jar by rinsing it with hot water and drying it thoroughly before filling.
Place the garlic and chilies into the jar, pour in the cooled vinegar mixture until everything is submerged, then seal the lid tightly. Store the jar in a cool, dry place away from direct sunlight. After 2–3 days, the garlic will be ready to enjoy—crisp, tangy, and beautifully white.
Each time you take garlic from the jar, always use clean chopsticks or a spoon to avoid contamination. Never allow water, food scraps, or oil to fall into the jar, as these can cause spoilage.
If you remove more garlic than you plan to eat, do not put it back into the jar—once exposed to air, it may introduce bacteria that ruin the entire batch.
With the right type of mature garlic, quality vinegar, and a bit of patience, you’ll have perfectly white, fragrant pickled garlic that stays delicious and safe to eat for months.