11 dishes you should never cook in an air fryer; don't try it or you'll regret it.
Tips 14/01/2026 22:28
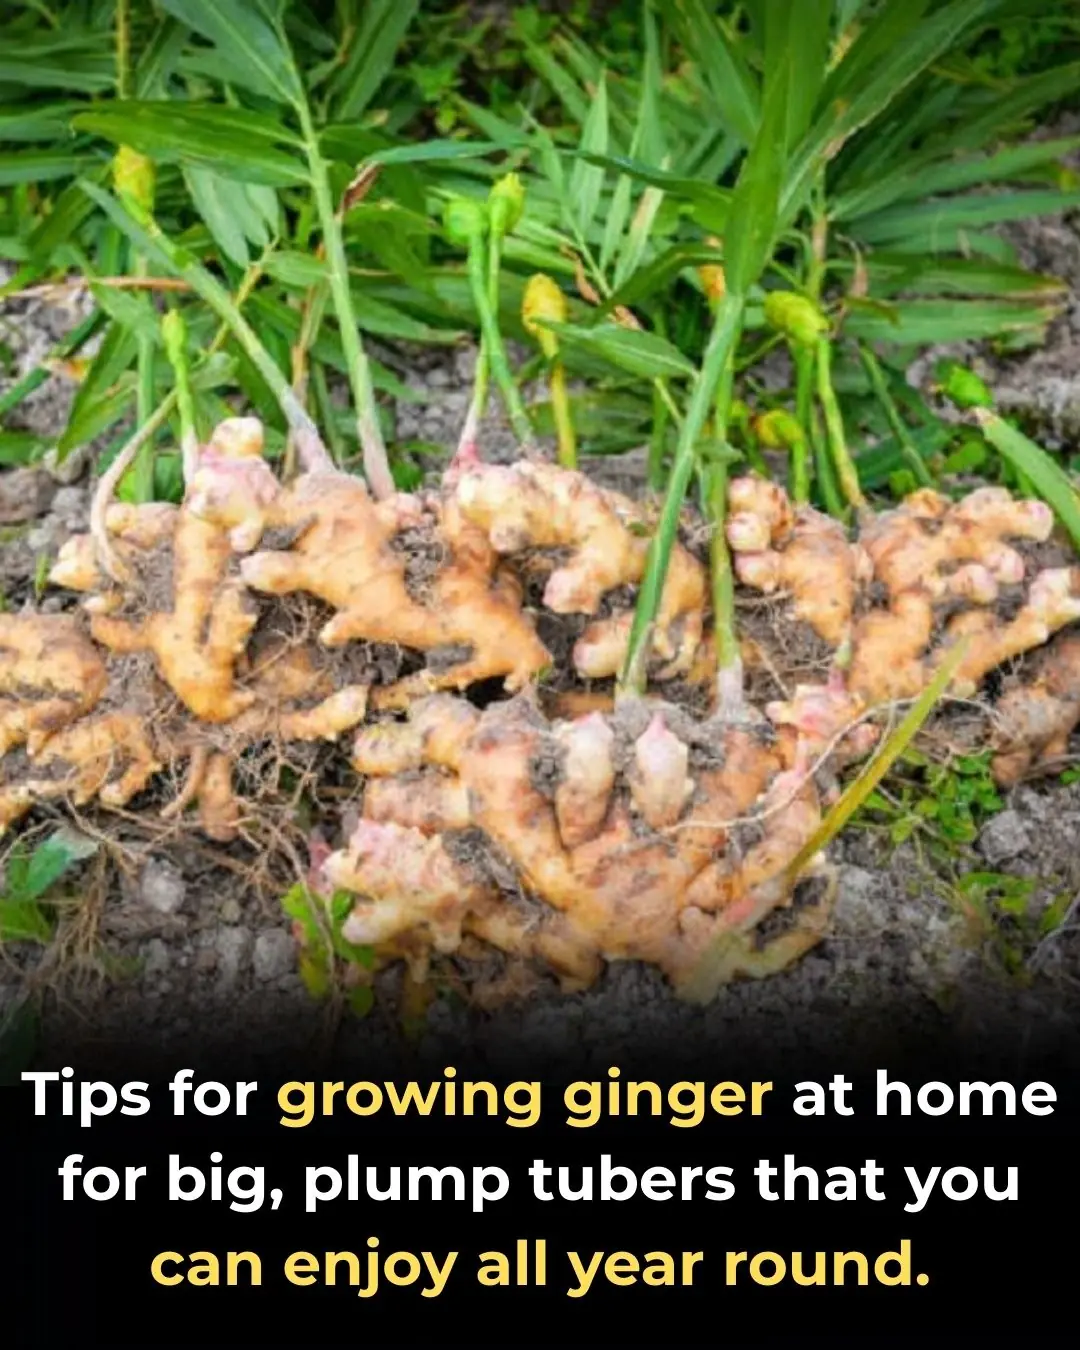
Ginger is one of the most useful and versatile ingredients in every kitchen. It’s not only a flavorful spice for cooking but also a powerful natural remedy for colds, sore throats, and digestive issues.
Fortunately, growing ginger at home is simple, low-maintenance, and rewarding — you’ll always have fresh ginger on hand without needing to rush to the market.
For home cultivation, choose small, aromatic ginger types such as se ginger or dé ginger. These varieties have a stronger, spicier flavor and the plants grow to a manageable height that won’t easily break or topple over.
Select plump, smooth, and firm rhizomes (ginger roots) with several visible “eyes” or buds. Avoid using old, shriveled, or moldy pieces, as they will sprout poorly. Trim off the root base if it looks dry or damaged.
💡 Tip: Fresh ginger from the market can also be used for planting if it hasn’t been treated with growth inhibitors or chemicals. Choose organic ginger whenever possible.
Ginger grows best in loose, fertile, and well-drained soil rich in organic matter. It thrives in moist but not waterlogged conditions.
Choose a plastic or ceramic pot about 35–40 cm deep and 30–35 cm wide.
Mix the soil using one of the following combinations:
2 parts garden soil + 1 part compost or organic fertilizer, or
1 part rice husk + 2 parts nutrient soil + 1 part worm castings (vermicompost).
You can also grow ginger in old sacks or fabric grow bags — this method allows the roots to expand freely and makes harvesting easier.
Soak the ginger pieces in water overnight to stimulate sprouting.
Cut the rhizomes into 40–60 g pieces, making sure each piece has at least one eye or bud. Avoid damaging the eyes.
Fill half of the pot with soil, press gently to compact it slightly, and bury the ginger pieces about 2.5–3 cm below the surface.
Water lightly two or three times a day during the first week, keeping the soil moist but not soggy to prevent rot.
⚠️ Don’t plant the rhizomes too deep — ginger prefers to stay near the surface where it can breathe.
After about 20 days, you’ll see tiny green shoots appear. When the plant has several leaves, reduce watering to once a day, ensuring the soil remains slightly damp.
Keep the pot in a shaded, well-ventilated area, such as a balcony or veranda.
Move it occasionally to a sunny spot for 5–6 hours per day to encourage photosynthesis and healthy growth.
As the rhizomes start to expand, add a 3–4 cm layer of compost or loose soil to cover the exposed parts.
Feed the plant every 3–4 weeks using organic fertilizers like worm castings, compost tea, or diluted fish emulsion to promote root development.
🌞 Extra tip: During the hot season, mist the leaves occasionally to maintain humidity — ginger loves warm, slightly humid conditions.
Ginger takes 7–8 months to mature. When the leaves turn yellow and begin to dry, it’s time to harvest.
Carefully loosen the soil around the plant and lift the rhizomes gently to avoid scratching or damaging them. Injured roots can easily rot or attract pests.
You can harvest a few pieces at a time, leaving the rest to continue growing. Freshly harvested ginger should be washed, air-dried, and stored in a cool place.
🧺 Bonus: You can also keep a few rhizomes aside for replanting — this way, your ginger garden keeps producing year-round.
Keep the soil moist but not wet — overwatering is the most common cause of failure.
Avoid direct midday sunlight; ginger prefers filtered light or partial shade.
Use only organic fertilizers to ensure the rhizomes are safe and flavorful.
Rotate or refresh the soil after each harvest to prevent nutrient depletion.
Growing ginger at home is easy, space-saving, and incredibly practical. With just a few steps, you can enjoy fresh, aromatic ginger all year long — perfect for cooking, making tea, or boosting your immune system naturally.
🌱 A pot of ginger on your balcony is not just a plant — it’s a little home pharmacy and a touch of green life in your kitchen.